



Fringe Sport Dane 3.0 Review
Fringe Sport Dane 3.0 Review: Smart Cable Routing and Easy Adjustments
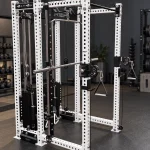
During a visit to Fringe Sport headquarters in Austin, Texas, I had the opportunity to check out the Dane 3.0. What stood out most was how Fringe addressed some of the small frustrations that come with combining a squat rack and functional trainer.

The cable routing keeps the working area clear, the trolleys adjust with one hand, and the cable movement felt smooth during my demonstration. Those details can make a real difference when you are moving between exercises.
There are tradeoffs, though. The cable system occupies some mounting space, and accessory compatibility deserves a closer look before buying.
This review covers my hands-on showroom impressions. I have not assembled the Dane 3.0 or put it through long-term testing in my garage gym.
Fringe Sport Dane 3.0 Review — Pros and Cons
Pros
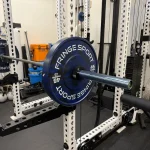
- Cable routing kept cables clear of the front barbell plate path on the showroom setup.
- Trolleys were easy to adjust with one hand.
- Cable movement felt smooth during my demonstration.
- Easy-to-read upright numbering helped with positioning.
- Integrated weight horns provide a convenient way to add plates.
- Familiar upright format offers potential accessory flexibility, subject to fit checks.
Cons
- Cable hardware occupies some crossmember mounting space.
- Smith attachment clearance was a concern on the configuration I examined.
- Accessories requiring Rogue-style keyholes will need a different mounting solution.
- Magnetic accessories did not stick to the display unit's stainless front uprights.
- Finish choices may disappoint buyers looking for a more colorful rack.

Dane 3.0 Specifications and Pricing
The following are manufacturer-listed specifications, checked October 19, 2026. Fringe advertises an October 23 launch; pricing and availability may change.
| Specification | Dane 3.0 |
|---|---|
| Black finish price | $2,999 |
| Stainless steel option price | $3,199 |
| Dimensions | 60.3 inches L × 58 inches W × 93.6 inches H |
| Assembled weight | 798 pounds |
| Uprights | Nominal 3 × 3 inches; listed as 75 × 75mm |
| Steel | 11-gauge |
| Attachment holes | 1 inch, with 2-inch spacing |
| Listed rack capacity | 1,200 pounds |
| Weight stacks | Two 220-pound stacks; 440 pounds total |
| Adjustable trolley ratio | 2:1 |
| Dedicated lat pulldown and low row ratio | 1:1 |
| Listed cable travel | Trolleys: 88 inches; pulldown/low row: 44 inches |
| Included equipment | J-cups, Needle spotter arms, Magpins, extension feet, D-handles, and integrated weight horns |
| Built-in stations | Lat pulldown and low row; their cable attachments are listed separately |
| Listed warranty | Lifetime rack; five-year pulley system |
| Shipping | Advertised free shipping to the lower 48 states |
Source: Fringe Sport Dane 3.0 product page.
The Cable Routing Was My Favorite Design Detail
One of the first things I noticed was where Fringe placed the cables relative to the uprights.
On my Rogue FM6 setup, the side cable path can sometimes put the cable close to the plates when I am working out in front of the rack. Depending on the bar position, that can become an annoyance while benching or squatting.
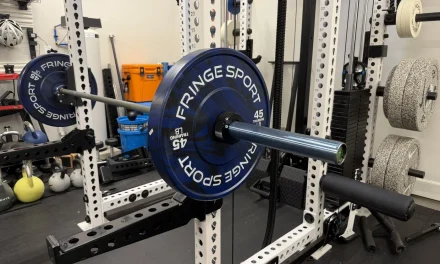
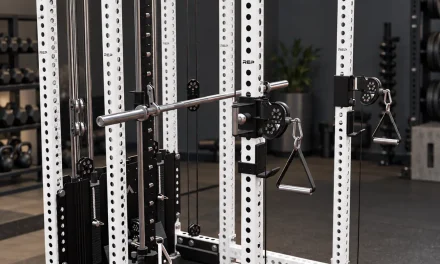
On the Dane 3.0 I examined, the cables ran behind the front uprights, keeping them out of that plate path. It was a thoughtful solution to a problem that might not be obvious until you spend time using a rack with an integrated cable system.
I also liked how the upper cable moved up and out of the way as I raised the trolley. The layout looked clean and made the front of the rack feel less cluttered.
One-Handed Trolley Adjustments
I could adjust the Dane 3.0 trolley using one hand.
That may sound like a small feature, but it stood out because I typically use two hands to reposition and secure the trolley on my own setup. When you are changing cable heights between exercises, an easier adjustment is something you will appreciate repeatedly.
The upright numbering was also easy to see, making it straightforward to identify a position and match the opposite side.
Smooth Cable Movement
I tried the cable system during my visit, including a pressdown movement, and it felt very smooth.
There was also a rubber stopper at the cable end. I cannot say whether that component is new compared with the previous Dane, but I liked seeing it on the unit I used.
My time on the machine was brief. The cable feel made a strong first impression, although I would want extended training time before judging wear, maintenance, or performance across a wider range of exercises.
Weight Horns Add Flexibility
Another feature I liked was the integrated plate-loading horns above the stacks. Rather than relying solely on the selectorized weight, the design gives you a place to add plates.
During the walkthrough, adding a plate looked straightforward: slide it onto the horn and you are ready to go. I did not test the maximum added load.
The narrower stack layout also caught my attention. It helped explain how Fringe made room for the cable arrangement I liked so much.
The Cable Layout Has a Tradeoff
Moving the cables out of the barbell’s way does use space elsewhere.
Some of the crossmember mounting area on the showroom unit was occupied by the cable system. If you plan to add attachments around that area, you need to consider the complete layout rather than looking only at the available holes.
During my walkthrough, I also pointed out that the cables appeared to obstruct the space where a Smith attachment would need to go. I would confirm compatibility directly with Fringe before planning a Smith conversion around this rack.
For someone who wants a rack and functional trainer, that may be an acceptable compromise. For someone building around a specific future attachment, it could influence the purchase.
Will Rogue and Other Rack Accessories Fit?
The nominal 3 × 3 upright format and 1-inch holes make the Dane worth considering if you already own rack attachments.
However, matching those two measurements does not guarantee that every accessory will fit. Check the attachment’s actual dimensions, pin spacing, and clearance around the trolley and cables.
One clear difference I noted was the lack of Rogue-style keyholes. An accessory that specifically requires that keyhole mounting pattern should not be assumed compatible with the Dane’s round holes.
Black or Stainless Steel?
I liked the appearance of the stainless front uprights on the display model, but there was a practical detail worth mentioning: my magnetic accessories would not stick to those stainless uprights. They would attach to the black steel sections at the rear.
If you regularly park magnetic collars or other accessories on the front of your rack, that could affect your finish choice. This observation applies to the unit I examined; stainless steel’s magnetic behavior varies by alloy.
Personally, I would also enjoy seeing more color choices. A white option would look great in my gym.
Needle Spotter Arms
The showroom rack also had Fringe’s Needle spotter arms installed. I already like these arms, and their front-loading mounting approach is convenient.
We actually reviewed the Needle Spotter Arms and really like them.
They were paired with Fringe Magpins during the demonstration. The arms fit the overall setup well and were another feature I was glad to see while walking through the rack.
Assembly: Promising Layout, but Not Yet Tested
Looking over the cable arrangement, my impression was that it might be easier to work with than the cable setup I dealt with on my Rogue.
That is an impression from examining an assembled unit, rather than an installation result. I have not built the Dane 3.0 myself, so I cannot give it an assembly time or call the process easy based on firsthand installation experience.
Before ordering, check the assembly instructions and allow room for overhead components and installation access, particularly in a garage with a low ceiling.
My Initial Verdict
Fringe Sport put real thought into how the Dane 3.0 works as a combined rack and cable machine. The features that impressed me most were practical: clear cable routing, easy trolley adjustments, and smooth movement.
Based on my showroom visit, it is a compelling option for someone who wants barbell and cable training in the same setup. I would pay particular attention to attachment plans and ceiling clearance before ordering.
I came away impressed. A longer test in my own gym would be the next step before making a final judgment on assembly, durability, and everyday ownership.
What stood out most during my Dane 3.0 walkthrough?
The cable routing and one-handed trolley adjustment. Both addressed frustrations I have encountered with my own rack and cable setup.
Did I test the Dane 3.0 at home?
No. These impressions come from my visit to Fringe Sport headquarters and the demonstration shown in my video.
Can I add a Smith attachment to the Dane 3.0?
The cables appeared to obstruct the necessary space on the unit I examined. Confirm a specific attachment’s compatibility directly with Fringe before purchasing.
Will all of my existing rack accessories fit?
Not necessarily. Check actual upright dimensions, pin spacing, mounting requirements, and cable clearance. Accessories that require a Rogue-style keyhole pattern are a particular concern.
Did I assemble the Dane 3.0?
No. The cable arrangement looked approachable during my inspection, but I have not tested the installation process.